Touring ski gear


For the last 2 years we have sold Cross Country skis from Alpina and for this winter we have expanded our range to include backcountry touring skis from Alpina. This gear has important differences from regular cross country gear opening up much more terrain for you to explore.

Lets have a look at the gear and the differences in more detail.

What is ski touring?

Ski touring involves leaving the groomed pistes of a resort and heading off into the back country. It can be as simple as finding a snow covered hiking trail or logging road and exploring it on skis through to  a multi day expedition in the mountains climbing peaks and crossing glaciers enroute. There are two distinct branches of the sport. Firstly Alpine touring, which uses lightweight downhill skis and boots with different bindings to release the heel for climbing. This usually involves steep ascents and descents crossing avalanche prone terrain and requires specialised gear and knowledge. The second branch is recreational touring which uses gear more closely related to cross country ski gear and generally stays at a lower altitude exploring more gently rolling terrain away from areas likely to avalanche. It is the latter which we will look at in more detail.

The Skis

WOO

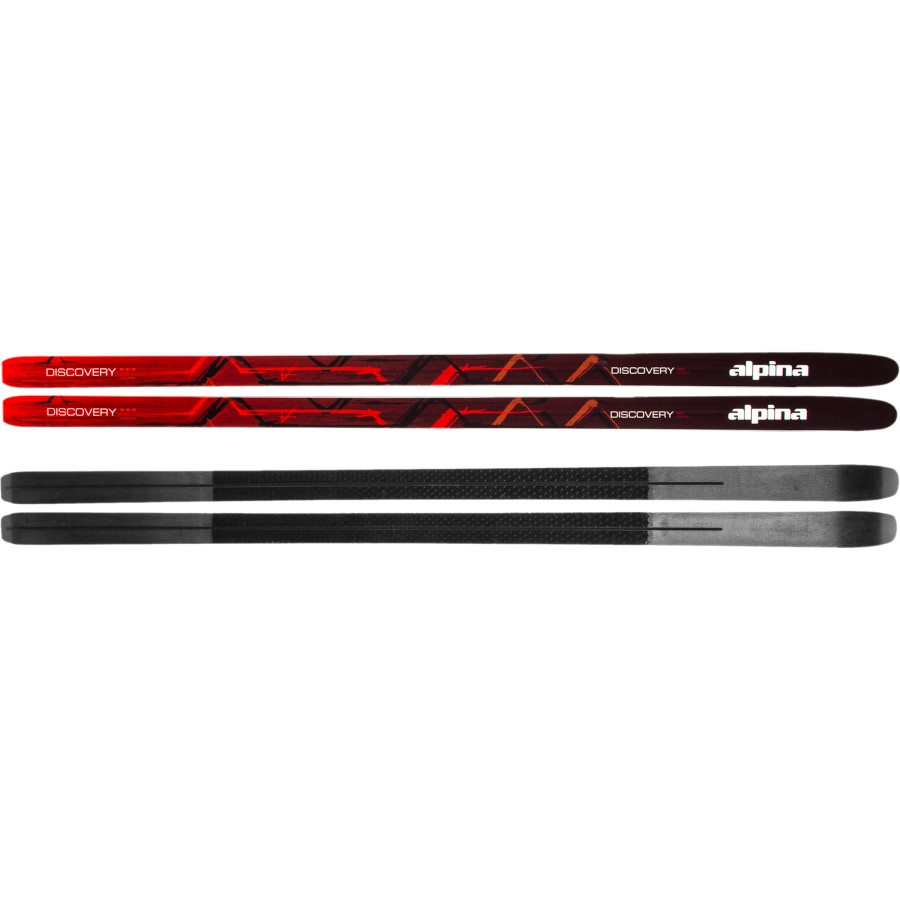
The Alpina Discovery Ski lives for breaking trail, snaking through glades, and spanning open bowls, and with a shorter length and wider waist than classic skis, it was born with the physique to do so. Its lightweight cap construction combined with the ample waist floats through soft-snow, its grippy waxless base makes climbing a breeze, and its full metal edges give it bite for carving control on the descent.

The Discovery skis from Alpina have several crucial differences from regular cross country skis. Touring skis are generally shorter, wider, have more sidecut and have metal edges. All of these features make them suitable for use out of regular trails and give them the ability to carve turns better than regular cross country skis. So if we compare the Discovery touring skis with the regular Promise cross country skis from Alpina we find that:

DISCOVERY

User Type Touring
Backcountry

Lengths160, 170, 180, 190 cmBindingNNN BC bindingSidecut68-60-65FeaturesWoodcore air channel
non wax
Cap construction
3/4 Steel edges

Promise S

Color White / Green
Code SM4611
User Type Touring
Lengths 178, 183, 188, 193, 198, 203, 208 cm
Binding T3 touring
Sidecut 51-49-50
Features Woodcore air channel
Ultratuning base finish
Cap construction

The Discovery skis come in shorter lengths, this makes the skis more manageable and maneuverable in the backcountry. The discovery skis are wider to give you more support and floatation in deeper, ungroomed snow. They have more sidecut, the shape of the skis, wide tips, narrower waist and wider tails. This sidecut makes it easier to carve turns when descending making it more comfortable to descend longer, steeper slopes than it would be on relatively straight cross country skis. The metal edges help with this by allowing the edges of the skis to bite into the snow to give more control when descending or crossing harder/icier snow when climbing. Note that although designed to be used off the groomed trails they are still narrow enough to be used on the groomed trails which are usually channel cut to a width of between 60 and 70mm.

Boots

TRAVERSE

The Traverse boot that we sell to go with the Discovery skis is a purpose designed touring boot. It is designed to be used with the NNNBC binding, this is a binding designed specifically for backcountry use. They are wider, thicker and more durable than regular NNN cross country ski bindings to cope with the increased demands of skiing off groomed trails. In a similar way the touring boots are thicker, stiffer and more durable. They are generally higher cut to provide more ankle support and warmer as they will be used in deeper snow conditions. They still have the flexibility to ski heel free in comfort but have the stiffness needed to ski downhill and control the metal edged skis when doing so.

Poles

Backcountry poles usually differ from regular cross country poles in that they are adjustable allowing them to be shortened for ascending and descending and lengthened for skiing on the flat or on groomed trails. If used off trail they will usually have bigger snowbaskets fitted to them for added support in deeper snow.
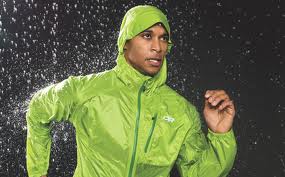
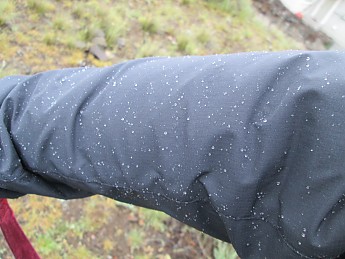
Clothing

You can explore the backcountry in your regular cross sountry ski gear or hiking gear but you will probably want to pack extra layers as you are in the backcountry and in case of unforseen situations. Whatever gear you choose to wear remember the key to comfortable backcountry skiing is to avoid sweating as this will cause you to lose heat rapidly if you stop. So travel at a comfortable pace and avoid undue exertion when climbing. Having wicking base layers and good breathable but windproof layers will help immensely.
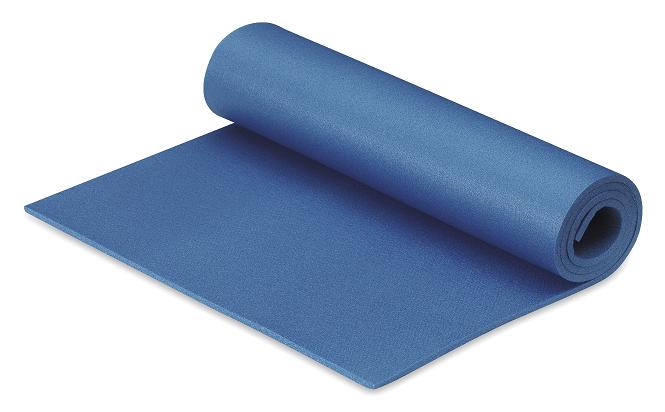
Safety gear

If you are going off the groomed trails make sure that you are packing the essential safety gear including navigation equipment and maps, spare clothing, food and water, headlamp, first aid kit, spares kit. If you are heading into potential avalanche terrain then you should have undertaken some avalanche training and be carrying a beacon, shovel and probe and the knowledge of how to use them.

So get off the groomed trails and explore the wonderful world of the backcountry or extend your season before and after the ski hills have opened and closed for their season. See you out there.

Posted in Uncategorized | Leave a comment

Paddling into the Fall

58838_506523582699249_1336055624_n

As summer comes to an end some of the summer gear gets put away and our thoughts turn to the approaching winter. But should our kayaks be one of those things to be put away? For some people the answer will be yes as they will prefer to do their paddling in the warm weather but for many of us it is time to adjust some of our gear ready for a different season of paddling.

Paddling in the fall and on into the winter brings both challenges and rewards, shorter days but glorious colours, colder weather but clearer air, rougher seas but lots more wildlife out on the water with you.

As the weather changes to colder temperatures, increased rainfall, shorter days the first consideration we have to make is to our wardrobe. Gone are the days of paddling in shorts and a thin paddling top or t shirt. Now we have to consider layering up and dressing for the water temperature rather than air. Last year we looked in detail at clothing for winter paddling and now might be a good time to visit that entry which can be found here;

Clothing for paddling in the winter.

As we enter the fall we can begin by adding an extra layer for warmth, typically a synthetic fleece or heavier weight base layer and adding a rain shell or paddling jacket over the top. Our shorts may be replaced by a pair of base layer pants and/or fleece/heavier pants. Our footwear will change from sandals/water shoes to thicker neoprene boots with or without warm socks inside, and we will endeavour to keep our feet dry getting in and out of our boat.

One of the biggest changes when paddling on into the fall will be the extra gear that we pack with us. As well as the extra clothing that we are wearing we will have a drybag of extra clothes in case of a mishap or the need to add extra layers. We will also dig out a toque, waterproof rain hat, paddling gloves or pogies. We may replace our nylon sprayskirt with a heavier duty, tighter fitting neoprene one to keep the warmth in our boat and to seal out the sea. With the shorter days we’ll make sure that we have a flashlight or headlamp in case we come back later than expected and it is starting to get dark. I carry a small waterproof shelter that a group of up to 6 can sit inside if it rains during our lunch stop, a large tarp can perform the same function. The food we pack for lunches will change, we will likely have more food to replace lost energy during colder weather paddles and we may carry extra food just in case we need it. We will dig out the thermoses for taking meals such as soup or chilli to warm us during lunch stops. I usually carry a small stove and pot so that if necessary I can make a hot drink during a shore break. We will listen in to the weather updates on VHF radios with more attention to make sure there aren’t any sudden changes happening in the weather that might catch us out. If we are going further afield on a day paddle we might consider packing some camping gear just in case we get caught out by weather or time and decide its better to spend a night in the warm rather than trying to make it back in worsening weather. If this is the case make sure you can let your emergency contact know the change in your plans.

Planning trips and watching the weather becomes more important to make the most of those good days and to ensure that we aren’t being too ambitious with our plans and don’t get caught out by weather changes which can be more sudden and dramatic than in summer. Erring on the side of caution more when the weather may be worse and the days shorter is a prudent practice. Considering where we are paddling and thinking carefully about bad weather alternatives to shorten trips if necessary become more to the forefront in our planning.

Consider where you are paddling, Fall can be a great time to explore larger lakes that are too busy in the summer but in fall make great paddling destinations with calmer water than the ocean and beautiful fall colours as a backdrop. Lakeside campgrounds will be quiet and empty making these areas perfect for overnight trips.

So don’t necessarily think that now summer is over its time to put the kayaks away until the spring. Withe the right gear selections fall, and even into the winter, can be a great time to be out paddling just check the weather, plan appropriate objectives and get out and enjoy the beauty at this time of year.

See you on the water!

Posted in Uncategorized | Leave a comment

Waterproof technology

Well Summer is on its way out and Fall is waiting in the wings, bringing with it the likelihood of wet, rainy conditions. So it is time to dig out those rainshells, rain pants and waterproof shoes and boots again. Or maybe its time to upgrade or replace your old ones. We get lots of questions in the store about waterproofs so I thought now would be a good time to look at the different technologies available to keep us dry while enjoying the great outdoors here on the Island.
index
Waterproof layers have to have two functions, firstly to keep us dry on the outside and secondly to keep us dry on the inside. If their sole function was to keep us dry from rain falling on us we could simply make a layer out of thick plastic and we would be kept dry from the rain. Plastic unfortunately doesn’t allow our sweat to escape and so as soon as we started being active we would get wet from the inside. This ability to allow moisture caused by perspiration to escape is known as breathability. Lightweight rainshells can improve breathability in their construction by the addition of pit zips or torso zips, by having pockets made of mesh so that when the zipper is open air and moisture can escape from the jacket. But the most dramatic increase in breathability comes from the material that is used in the construction of the jacket.
Before we get into the different technologies lets just examine one technology that all rainwear has in common and that is a Durable Water Repellancy (DWR) finish that is applied to the outside of the jacket. This is a chemical treatment that causes water that lands on the jacket to “bead” or to form a droplet that will fall off or can be brushed off to allow the outer fabric of the garment to stay dry.

IMG_0325

This DWR treatment is the primary barrier to rain and if maintained helps to improve the garments breatheability. However over time this DWR finish will break down and cause the outer fabric to absorb water, or wet out. If this happens the breatheability of the garment will fall and you will start to get a build up of moisture inside the jacket making people think that their jacket is no longer waterproof. So it is critical to maintain this DWR finish by periodically cleaning the jacket with a suitable cleaner such as Grangers cleaner and then reapplying the DWR finish with a wash in or spray on treatment like Grangers proofer. Washing the garment in regular detergent can strip off this DWR treatment.

Ok so why are some rainshells 3 times the price of others? This comes down to the materials and technologies used to make them. All rainshells will have a facing fabric, the outside layer that has the DWR finish applied to it and this is there to give the jacket its durability. More expensive garments will have a heavier but more durable fabric on the outside and this makes them suitable for mountaineering, climbing, backcountry skiing and bushwhacking where a lighter fabric would be in danger of being ripped or torn.

The part of the garment that alters the performance and price of the garment is the next layer. This is the waterproof/breathable layer and it may be applied as a laminate or as a coating and we’ll now look at these in more details.

The waterproof breathable component of a rainshell is made up of an ePTFE or PU derived material and it can be found either as a laminate, a separate layer applied to the inside of the outer fabric or as a coating to the back of the outer fabric. If it helps think of a laminate as wallpaper applied to a wall and a coating as a layer of paint applied to the wall. Laminate construction is usually found on more expensive pieces and coatings generally on lower price point pieces. Examples of a coated layer would be The North Faces Hyvent material and examples of a laminate would be Goretex, eVent or Polartecs new Neoshell. The waterproofing abilities of both laminates and coatings are pretty similar but the laminates generally have the higher breathability ratings. At present there is no industry standard to compare breathability ratings and you may see seemingly impressive numbers given for how breathable a jacket is 10-20,000 being typical but that doesnt mean that a 20,000 jacket is twice as breathable as  10,000 jacket as the numbers may be been derived by different testing conditions, however it may be an indication that one jacket is more breathable than another. The breathability of most jackets is based on the membranes ability to transfer smaller water particles from the inside to the outside without letting larger rain drops  come in, to do this there has to be a temperature and pressure gradient across this membrane which causes the inside of the jacket to get warm and damp at times. Some newer fabrics, such as Polartec neoshell are more air permeable allowing the material to breathe without needing to build up that warm perspiration climate inside the jacket and the manufacturers claim improved breathability over other materials. However the downside is that these jackets are not as effective at blocking the wind as a traditional laminate.

The construction of the garment, as well as the membrane used, will affect the price of the garment. There are 3 basic constructions. The cheapest uses a 2 layer make up, here a coating is applied to the outer fabric making one layer and then the second layer is a hanging layer often a mesh material to protect the membrane. This mesh layer can bunch up and also makes the garments heavier. The most typical construction method is a 2.5 layer. Here the lightweight outer fabric has a second layer applied to it, typically a PU based coating and then this is overlaid by a very thin layer often in the form of dots or a patterned film that protects the membrane material. These garments tend to be lightweight and have good breathability but may be not as durable as the next method. The final construction method is a 3 layer construction. This sandwiches the breathable membrane, almost always a laminate layer rather than a coating, between the durable outer layer and a softer inner layer. This construction method is typically found on the higher price point garments which have the best breathability and durability.

So when looking for a new waterproof garment it is important to consider the use that you will put it to, a 2 layer jacket is perfect for gentle hiking, walking the dog etc whereas if you are putting it to use in more demanding terrain and conditions and under more aerobic activity then a more breathable 3 layer jacket may be more suited to your needs or if lightweight is a key consideration then a 2.5 layer jacket may be best for you. Take the time to come in and talk to us about your needs and we can help find the best jacket for you.

Posted in Uncategorized | Leave a comment

Sleepmats – a guide to choosing

We use a sleepmat for two reasons; to provide some cushioning from the uneven and hard ground and to provide insulation to keep us warm. When we lie in our sleeping bag the insulation becomes compressed under us and so we find cold spots developing where this is happening. Sleep mats come in many shapes and sizes but can basically be separated into 3 types: Foam mats, air mats and insulated mats. We will look at each in turn examining the pros and cons of each but before we do that lets just consider how we measure how much insulation we are getting. The insulation that a mat gives is denoted buy its R value.

R value is a measure of the thermal resistance of a material or product. For sleepmats the typical range is from 1-8 with 8 being the warmest.

Foam mats

    foammat

    Foam mats were the standard sleepmat for years, they are cheap, robust, cant leak or deflate and make from a dense closed cell foam. Typical R values are around 1 or 2 depending on the thickness of the foam. Some are shaped like the z rest from Thermarest to trap a layer of air to boost insulation. The downsides to the foam mat are that they are bulky, thin and comparatively not very warm or comfortable. They work great as an additional layer under an insulated mat for winter camping as they will provide some insulation should your other mat deflate, and will boost the insulation provided by your other mat. Sleeping on a foam mat will also allow you to appreciate the benefits of the other forms of mat!

    Air Mats

Air mats vary from the large bed like mats sold for car camping through to the ultralightweight backpacking mats form the likes of Cascades designs, Exped and Klymit. The larger car camping mats are too heavy and bulky for lightweight use and can be very cold to sleep on if the night time temperatures tend to be cool.
NeoAir_All_Season

The lightweight mats tend to have an R value of 1.5-5 which they achieve through the clever use of baffling to provide air pockets and the use of reflective materials on the inside designed to reflect heat back up to the sleeper instead of allowing it to be conducted away by the cold ground. Or, as in the Klymit, they cut away parts of the mat to allow for loft pockets where the sleeping bag can maintain its loft and insulative properties where it is not being compressed by the body.
The advantages of the airmats are that they are generally the smallest packing of the sleep mats as well as the lightest.
full_pad_-_new_medium_1_
The Klymit inertia mat weighs only 9 oz and packs down to 6” x 3”
Disadvantages are that they are not as thick or cushioning as insulated mats and they are susceptible to punctures meaning that greater care has to be taken when using them. They are not as warm as the warmest insulated mats.

Insulated mats.

    These provided the first alternative to foam mats when the early Thermarest mats appeared. They use an open cell foam enclosed within an airtight membrane to allow for greater cushioning, and reduced compression when the mat is inflated. This technology allowed the mats to become much smaller when packed away and allowed for greater insulation and higher R values.
    This type of mat typically has an R value of between 2 and 4 and is perfect for 3 season camping trips at relatively low altitudes.
    ProLite_2012

    As development of insulated mats progressed we find the open cell foam being replaced by other materials more typically found in sleeping bags. So the mats from Exped and Klymit use synthetic insulating materials or down to produce the thickest , warmest mats available. These mats are up to 2.5” thick and typically have R values in the range of 4-8 making them perfect for winter camping or for those people who want the warmest most cushioned sleep they can in a lightweight mat.
    0.B4!OpenElement&FieldElemFormat=jpg
    The downside to the insulated mats is that they are bulkier and heavier than air mats and also have the drawback that they can be punctured. They are also the most expensive to purchase.

    Care of Mats

When travelling with a mat store it inside your pack, except closed cell mats which are too bulky. Make sure that you have a puncture repair kit for your mat, if applicable. Most mats can be cleaned with a mild detergent solution. Try to avoid using the mat outside the tent as this is when most punctures occur.
It is worth taking time to consider which mat best fits your needs as these mats will last a long time, I have 30+ year old foam mats and 25+ year old thermarests that are still perfectly usable and I am sure I will still be using my exped mats in 20 years time unless something even better comes along!

Posted in Uncategorized | Leave a comment

Choosing a Paddleboard

With the rapid growth in the sport of paddleboarding we have seen an explosion in the range of paddleboards available to us. In order to help us choose the right board we need to ask ourselves a couple of questions. Where am I going to paddle and how am I going to paddle?

In terms of where am I going to paddle the possible answers may be Flat water, open ocean, waves and surf or rivers. Lets look at each of these options and consider the boards best suited to them while also considering the how am I going to padde question at the same time.


Flat water boards

This would be considered anywhere you intend to paddle board while not trying to catch and ride waves such as calm rivers, lakes and bays. Typical board sizes range from 10′-12’in length for recreational paddlers and 12’6 to 14′ for long distance or speed oriented paddlers. The typical shape of a recreational SUP board for flat water is very similar to a surfboard longboard; round nose, wide outline and a square tail. The longer the board the more surface area on the water and the better it will glide over the water for faster overall paddle speed. You may prefer to sacrifice some of the speed for a shorter board to make it easier to handle in and out of the water. If you are looking for a more specialized board for touring or racing then it will have quite a different shape having a more pointed bow with a finer entry and more of a keel shape. If you are looking for speed and a more athletic workout then choose a longer board.Here is a longer general purpose board suitable for carrying larger paddlers or more than one paddler, this board is very stable and is often used for the growing sport of SUP fishing.

Image


Whereas this board is a race/touring board showing the different shape. These boards are much faster through the water but may feel less stable due to their narrower width. They are also much less maneouverable than other boards making them less suitable for surfing.

Image


Moving water boards.

If you are looking for a board to surf with then like in regular prone surfing there are a lot of different shapes and sizes of boards for different styles of surfing. The smaller and less volume the board has the more maneuverable the board will be allowing for more aggressive surfing. A true surf model SUP will be in the 8’0 – 10’6 size range with shapes mimicking those of surfboards from short boards with pointed noses to longboards. Typically the less volume to the board the more maneuverable, responsive and performance oriented the board will be. Of course it still needs to float you while paddling standing up.Surfing SUPs will generally have more rocker to make them more maneouverable on the waves. here is an example of a 10’6″ board suitable for surf.

Image

Increasingly SUP’s are starting to be seen on white water rivers, the standing position giving excellent vision for reading the water. This is where inflateable boards really come into their own both in terms of ease of transportation to the river and less likelihood of damage when hitting rocks. These boards tend to be shorter and have enough rocker to make them easily maneouverable around obstacles.

Image

How big a board do I need?

The size of board will depend upon what you want the board to do as we discussed above and your weight. Most board manufacturers will print a weight range for each of their boards which you can use to choose the best board for you, but a good rule of thumb is to look at the volume of the board in litres and compare that to the equivalent weight in pounds so a board of 220 litres would be suitable for someone up to around 220 lbs.

What about fins?

Boards come with a varying number of fins depending upon the use you intend to put them to

Single Fin: Many paddle boards will have one large fin directly in the back center of the board near the tail. This large fin which can range anywhere from 8-10″ in length helps to track the board on the flatwater or face of the wave while surfing.

2 Plus 1: This is a very common type and usually includes a large single fin 8-10″ tall in the center and 2 small side fins 3-4″ in tall on the left and right. The side fins help the board track better through turns while surfing on the face of the wave and help the tail hold the wave face.

Quad Fins: Quad fins are 4 fins total with a large and small fin mounted along the rail on both sides of the tail. Quad fins help the board drive in slow spots due to the lack of drag from a center fin and also help the board grip and track on hollow waves since the fins are situated along the rail line.

So there you have a brief guide to different paddle boards if you need more information or help come in and we can help you choose the right board for you

Posted in Uncategorized | Leave a comment

Choosing a Sleeping Bag

v\:* {behavior:url(#default#VML);}
o\:* {behavior:url(#default#VML);}
w\:* {behavior:url(#default#VML);}
.shape {behavior:url(#default#VML);}

Normal
0
false

false
false
false

EN-CA
X-NONE
X-NONE

/* Style Definitions */
table.MsoNormalTable
{mso-style-name:”Table Normal”;
mso-tstyle-rowband-size:0;
mso-tstyle-colband-size:0;
mso-style-noshow:yes;
mso-style-priority:99;
mso-style-parent:””;
mso-padding-alt:0cm 5.4pt 0cm 5.4pt;
mso-para-margin-top:0cm;
mso-para-margin-right:0cm;
mso-para-margin-bottom:10.0pt;
mso-para-margin-left:0cm;
line-height:115%;
mso-pagination:widow-orphan;
font-size:11.0pt;
font-family:”Calibri”,”sans-serif”;
mso-ascii-font-family:Calibri;
mso-ascii-theme-font:minor-latin;
mso-hansi-font-family:Calibri;
mso-hansi-theme-font:minor-latin;
mso-fareast-language:EN-US;}

Summer is coming and that means camping season. The best way to have an enjoyable time camping is to get a good night’s sleep. To get a good night’s sleep you need the right sleeping bag for the conditions and trip you are undertaking. If you are too hot, too cold or too restricted you won’t sleep well and you won’t be a happy camper in the morning.

1.     Choose the appropriate bag.  If you are camping in the back yard in August you won’t need that 4 season minus 30 degree bag. Choose a bag that is suited to the conditions that you will be camping in most of the time. You can still use it in cooler times by wearing more clothes to bed or by adding a cotton or fleece liner to the bag to extend its range. If you use too warm a bag in warm weather you will be too hot and won’t get a good night’s sleep either.

2.     Think about how you will be carrying the bag. The cheaper bags tend to use heavier material in the lining and the outer fabric. His makes the bag heavier and bulkier when packed. If you are car camping this doesn’t matter, if you are canoe or kayak camping it may not be a big issue either. But if you are backpacking then you want to get the smallest packing and lightest bag that you can afford to reduce pack weight and size that you will have to carry.

3.     Choose the shape of the bag  Some bags are rectangular in shape and generally these bags have more room for you to move about, can be zipped together more easily and can be opened out and used as a duvet more easily on warm nights. However they lack hoods and generally don’t seal you in as well as a Mummy shaped bag. But if you are car camping in summer in warm latitudes then a rectangular bag may suit your needs better. Generally for a better sleeping experience go with a Mummy shaped bag. Many better quality manufacturers will offer women’s and men’s bags. Women’s bags are generally shorter than men’s, wider at the hips and narrower at the shoulders and may have more insulation in different areas, for example around the feet.

4.     Check out the temperature rating of the sleeping bag  In the past there was no standard for temperature ratings on sleeping bags and it was left to the manufacturers to rate their sleeping bags as they saw fit. Now many manufacturers are adopting the rating standard used in Europe known as EN13537. If a bag uses this standard you will usually see a label like this on the bag.

Image

The standard will give 3 or 4 temperatures for the bag, this may seem confusing but this guide will help you choose which one is most appropriate for your needs.

  • The upper limit is the highest temperature at which a ‘standard’ adult man is able to have a comfortable night’s sleep without excess sweating. This may not be labelled
  • The comfort rating is based on a ‘standard’ adult woman having a comfortable night’s sleep.
  • The lower limit is based on the lowest temperature at which a ‘standard’ adult man is deemed to be able to have a comfortable night’s sleep.
  • The extreme rating is a survival only rating for a ‘standard’ adult man. This is the temperature at which a standard man will survive the night but it will not be comfortable!

The transition zone, in between the comfort and lower limit, is usually considered as the best purchase guideline. Bearing in mind the average man and woman are generalisations and you will need to factor in how you sleep. It is also conducted assuming the person is wearing one base layer and a hat and is sleeping on a 1” mat. So if you have a thicker, warmer mat and wear more layers you may be able to use this bag at a lower temperature and still be comfortable.

     Choose the insulation material. Here you have two choices Down or synthetic materials

Quick Guide to Down

Pros

  • Is warmer than synthetic insulation ounce for ounce. No manmade fiber matches down in its warmth-to-weight ratio.
  • Retains its shape and loft and, with proper care, can last a lifetime. No synthetic can beat down’s longevity. Down holds up better over years of use.
  • Wicks body moisture and allows it to evaporate. Moisture wicking goes a long way in keeping you comfortable.
  • Is highly compressible and lightweight. Although synthetic insulation has come a long way, it doesn’t hold a candle to down’s ultralight weight and amazing compressibility. Down is the preferred choice for backpackers who want to travel light in dry conditions.

Cons

  • Loses its insulating properties when wet and is slow to dry. And if down gear is damp-especially in a humid climate-it will take a great deal of time to dry. Don’t count on leaving your wet sleeping bag to dry while you take a day hike. Chances are it may not be dry enough for you to sleep in that night.
  • Requires special cleaning. Cleaning down gear is labor intensive. Harsh detergents and chemicals will break down its natural loft and luster. If you don’t dry clean your gear, only very mild detergents or down-specific cleaning products should be used.
  • May contain allergens. Down is not entirely hypoallergenic. While the down may not cause an allergic reaction itself, lower quality down can harbor dust particles, debris, or other non-down materials, causing a reaction. However, higher quality down is cleaned according to strict industry standards. If you’re prone to allergies, it’s wise to invest in better quality down products.
  • Costs a pretty penny. Down insulation is far more expensive than synthetic insulation, but it’s a great value for the avid outdoor enthusiast if you factor in down’s resistance to deterioration. Recreational campers and hikers can get the job done with synthetic gear, which is usually a more wallet-friendly option.

Fill Power

Fill power is the volume in cubic inches that one ounce of down can fill up.  So, if the fill power of the down in your bag is 600, it means that one ounce of that down would fill 600 cubic inches.  The same weight of 800 fill-power down fills up 800 cubic inches, creating 33% more loft.  The official tests are done under lab conditions, with a particular protocol to ensure reliable results.  For outdoor gear, lower-end fill power ratings start at 500-550, and the top end possible (this is open for debate) is around 900.  Anything over 750 fill power can be considered expedition-ready, top-quality down.

Image

Dry Down

A recent development has seen manufacturers treating the down to make it much more resistant to absorbing water and therefore better able to cope with damp environments. Sierra designs led this movement with its dri down bags but now many other manufacturers are exploring this technology. Be aware though that the dry down treatments will wear off with washing, at present they suggest that about 10 washes will be the life of the treatment.


 Synthetic Fills

Synthetic insulation is essentially polyester threading that is molded into long single threads or short staples to mimic lofty down clusters. Thinner and lighter threads fill voids and trap warm air more effectively, while thicker strands sustain the loft and durability.

Quick Guide to Synthetics

Pros

  • Is water resistant and provides insulation when wet. Synthetic fills are, at the very least, resistant to moisture while many will actually shed water rather than absorb it. These water-resisting properties allow the synthetic fill to retain the majority of its insulating properties when wet.
  • Dries quickly. When a synthetic fill does get wet, the moisture is trapped in the air pockets between the fibers rather than in the fibers themselves. For this reason, synthetic fills will dry much faster than down fills-usually in a matter of minutes in direct sunlight.
  • Is generally less expensive than down.
  • Is easy to care for. Most synthetic fill sleeping bags or garments are machine washable and dryable.
  • Is completely hypoallergenic. Because synthetics are manmade, they are, for the most part, hypoallergenic.
  • Offers a greater range of options for those on a budget. Synthetic fills vary greatly in durability, bulk, weight, and price so there are more options available for beginning hikers or children who quickly outgrow their clothes.

Cons

  • Can be bulky and less compact than down. Synthetics tend to be much bulkier and less compact than down, taking up valuable space when you’re trekking around.
  • Heavier than down. Synthetic fill requires more weight to get the same warmth that the lighter down provides.
  • Breaks down over time. Synthetic fibers gradually break down no matter how well you care them. You may find yourself replacing synthetic products quicker than you would down products.
  • May cause fit problems. Some less-expensive synthetic fills can be stiffer than down and may not drape as well. Higher-end synthetic fills, though, can be hard to distinguish from down and fit just as well.


6.     Get a compression sac and a storage bag  Many companies supply both a compression sac and a storage bag with their sleeping bags. If not factor in the cost of these when comparing bags. A storage bag allows the sleeping bag to be stored folded a couple of times without compressing the bag too much; this will help to preserve the life of the filling and maintain the loft of the bag. A compression sac allows you to reduce the bulk of the bag by up to a third and this means that it will take up less space in your backpack, boat or bag.

7.     Keep your bag dry.  There is no worse feeling than arriving at your campsite on a wet day or after a long tiring paddle and finding that your sleeping bag is all wet. To avoid this feeling get a dry bag or waterproof compression bag to make sure that once you tent or shelter is sorted you have a nice dry, warm sleeping bag for the night.

For a fun guide to choosing a sleeping bag check out this Kevin Callan video clip

http://www.kevincallan.com/2011/02/16/ep2-choosing-a-sleeping-bag/#.UarP9JzElKY

Posted in Uncategorized | Leave a comment

Cooking in the Outdoors

Cooking in the outdoors.

Image

Food always tastes much better out in the fresh air and when we are camping we have many different options when it comes to cooking . This article will look at those options when we are travelling light, whether that be hiking, kayaking, canoeing or biking.

In the past cooking was a simple affair of getting a fire going and using that to cook food over. Nowadays it is not so easy as environmental and wildfire concerns make cooking over an open fire less practical. This means we have to carry a stove and fuel with us. The first question to solve is which fuel to use?

The choice is basically between canisters of isobutane/propane and liquid fuels such as superfuel or gas.

                                     Image                       Image           

Canister fuel

Liquid fuel

Advantages.

Instantaneous ignition

Simple to control

Stoves are smaller

Advantages.

Burns hot so short cook times

Fuel is more widely available and cheaper

Less affected by temperature and altitude

Able to be pressurised so performance is always constant.

Field maintainable

Disadvantages

Canisters are bulky and have to be carried out when empty

Doesn’t work as efficiently at high altitudes or low temperatures

Doesn’t burn as hot so cooking times may be longer and use more fuel.

As canister empties performance may deteriorate


Disadvantages

Very flammable so care needed with it

Most stoves require priming before starting

Stoves may require care to simmer.

Stoves are larger in size

Fuel is heavy as it is in liquid form.

Recently we have seen the arrival of stoves such as the Primus Omnifuel and the MSR WhisperLite Universal that are capable of running both fuel systems to give you the ultimate flexibility.


Canister stoves

Image

Canister stoves are typically small and compact stoves that screw directly onto the canister of fuel, they have a simple turn switch to allow the fuel to flow and may or may not have a built in lighter. The fuel canisters come in a range of different sizes allowing you to choose the suitable size depending on the duration of your trip and how compact you need the canisters to be. The arms on most stoves will fold allowing the stove to be packed into small spaces, some will fold small enough to fit in the curved underside of the fuel canister. The small size of these stoves mean that they are able to fit, alongside a small fuel canister, inside a small cooking pot making for a very compact and lightweight system.

Canister stoves are fairly simple pieces of equipment and the fuel they use is very clean so there is little maintenance to do on them, the flip side to this is that if they do go wrong it isn’t possible to repair them in the field so you may want to carry a back up if you are on a long or a remote trip.

One of the downsides to the canisters is that as the fuel volume reduces so does the pressure in the canister and this can lead to extending the boil time to the point where there is still fuel in the canister but it seems to take longer and longer to bring water to the boil. The reactor stove from MSR overcomes this with a clever pressure valve in the stove which means that you get a 3 minute boil whether the canister is full or practically empty. The fact that the canisters are not refillable often leads us to stockpiling a collection of half to 2/3 empty canisters in our garages which we never get to use. Because they are pressurised it has been hard to recycle the canisters but now it is possible to buy a tool, the crunch it, to puncture the canisters so that they can be accepted for recycling.

Liquid fuel stoves

Image

Liquid fuel stoves are much larger than canister stoves and use a refillable fuel bottle. A pump pressurises the fuel in the bottle and this pressure can be topped up as necessary whilst the stove is in use to maintain the flow of fuel. These stoves will burn a range of liquid fuels and come with different jets to allow the use of these different fuels. Some like the MSR XGK and the Primus Multifuel will burn just about any flammable liquid including gas, kerosene,diesel, aviation fuel,  etc. The fuel generally lasts longer than canisters requiring less space to haul it around. These stoves burn much hotter and are generally more efficient than canister stoves with quicker boil times. On the downsides liquid fuel stoves require more care when lighting as they need to be primed with a small amount of fuel at first in order to assure the vaporisation of the fuel coming to the burner so that your stove doesn’t turn into a flamethrower! I have fond memories of losing some eyebrows the first time I fired up my new liquid fuel stove many years ago! With care they stoves will last a very long time. My MSR Whisperlite International is over 20 years old and is still working perfectly after some routine maintenance. This is another advantage of the liquid fuel stoves is the availability of spares and maintenance kits so it is possible to strip them down and repair them in the field or at home to keep them operating efficiently.

If you have never done any maintenance on your stove or maybe its performance is starting to deteriorate then now is a perfect time to give it a service. You can buy annual maintenance kits which allow you to replace o rings and clean and tune up your stove. If you are not sure about how to do this then we have arranged for a clinic with the MSR technical rep on May 25th, you can bring your MSR stove to the store, pick up a service kit and get a hand to bring your stove back to its full operating abilities and efficiency. Just in time for your summer camping adventures. For more details see the item in our April newsletter or call either the Courtenay or Nanaimo stores.

Posted in Uncategorized | Leave a comment

Kayak Lessons- What can we help you with

For this season we have adjusted some of our kayak lessons to offer you the best range of lessons that we can. We have lessons for all, from complete novices to paddlers looking to develop their paddling skills.

 If you are a new paddler come and try our Taste of kayaking lesson which will give you a one hour lesson on land before a 2 hr introductory paddle, perfect for people who want to see if sea kayaking is for them. Alternatively is you don’t think sea kayaking is for you then our Recreational kayak basics will give you an introduction to paddling the shorter recreational kayaks on sheltered waters, using the same format with a one hour on land lesson followed by a one and a half hour paddle on sheltered water.

The next step from there would be to take our Essential Kayaker. This comprises a 2 hour session covering wet exits, self rescues and assisted rescues, this section can be taken separately as our Rescue I lesson. Then we have a theory session looking at equipment, clothing, safety and  trip planning. The final part of the lesson is a 3hr session covering the core paddlestrokes needed to confidently paddle your kayak efficiently.

Once you have the basics covered it is time to get out paddling and explore the fantastic area that we live. As you look to progress your skills and expand your paddling range we have a series of lessons designed to provide you with specific skills and knowledge.

We run some land based courses to give you the knowledge and understanding to deal with the changing marine environment. Our Current I course introduces you to reading and understanding tide and current tables to help with planning trips into new areas, and to develop an understanding of how water levels fluctuate during the day and night and what it means to us as kayakers. Our Current II lesson takes this a step further and introduces a set of easy to use rules and calculations to allow us to predict the water levels and current flows at any given time for any given spot on the coast.  If you are interested in taking longer day trips or multiday trips then our Navigation I lesson will introduce the basics of navigating from a kayak using compass and chart. It will help you develop the ability to produce a realistic floatplan and to be able to navigate when weather conditions make visual navigation difficult or impossible. The final lessons in this series take what you have learnt on land out into the kayaking environment. Navigation II is a daylong lesson on the water putting the skills you have learnt into practice, fixing locations, estimating times and distances, travelling on a bearing in poor weather etc. Current III gives you the opportunity to find out what it feels like to paddle in areas affected by currents, what does paddling against a 4 knot current  feel like, how can I safely cross a tidal current? This is also a day long on the water course.

To get the most out of the last 2 lessons you will need to have good paddling skills including the ability to edge and lean your boat and recover from moving water trying to tip you over. To learn these skills we provide a range of paddle skills lessons.                                                           Our Rescue II lesson is a 3 hour on water session covering an extended range of rescue techniques. It will give you the confidence to be able to get yourself back into your boat or assist someone else to get back into their boats in a wide range of conditions. We cover assisted rolls such as the bow roll and side by side paddleroll. The scoop and hand of god rescues to get an injured paddler back into their boat. We also look at a range of towing methods to assist paddlers back to shore. Our Developing Paddling skills lesson takes the basics strokes a step further by first refining and polishing the basics and making them as efficient as possible before moving on to look at more advanced strokes. We explore strokes useful in moving water such as the bow and stern rudders, high and low brace turns, sculling draw and sculling for support. We will also work on increasing your confidence to put your boat on edge to make these strokes more effective and efficient. Our Sculling and bracing course encourages you to really explore the limits of you and your boat, putting it on the maximum edge to be able to make your turns as tight as possible and to push your sculling and bracing strokes with the boat as far over as possible. Developing this confidence and ability leads perfectly into our last set of lessons that leads you into the ability to roll your boat back up from upside down, no more wet exits for you!

In our Rolling I course we begin with the theory and practice on dry land before moving to the water for a two hour rolling lesson. This lesson will give you the mechanics of the roll and a feeling for the process and from there on it is all about practise. Our Rolling II lesson takes this a step further and develops a roll using half of the spare paddle from your deck. This lesson works best if you have a pretty consistent roll on one side first. Our Introduction to Greenland rolling teaches you the Greenland sweep roll using your own Greenland style paddle which you will need to bring with you.

So lots of opportunities to learn with us, at all levels. You can find more information on these lessons in our brochures or on our website. If you have any questions about any of these lessons please don’t hesitate to contact us and ask for advice about which lesson is right for you.

Posted in Uncategorized | Leave a comment

Its Spring! Time for some Spring cleaning and gear checking.

Yes its that time of year again! The days are getting longer, clocks spring forward in a couple of weeks and it is slowly starting to warm up.

That means its time to start locating, checking and servicing our gear to get ready for lots of adventures.

I always find it amazing that despite neatly tidying away gear in the fall it always takes a while to find it all and check it over. There is a range of maintenance that we can do to make sure that everything is performing at its best in the coming seasons. I want to look at different types of gear and highlight the essential maintenance that we can do.

Kayaks and paddling gear maintenace was included in an earlier blog and so I am just going to refer you back to it via the link here.

https://aopmedia.wordpress.com/2012/04/22/peters-tips/#more-939


Clothing.

Clothing can be checked for any stitching, buckles etc that may need repairing. Now is a good time to think about reproofing water resistant and waterproof fabrics with a proprietary treatment such as Grangers or Nikwax. It is important to make sure the garments are clean and washed with a gentle action cleaner such as Grangers performance wash, our favorite, or woolite. If you use regular detergent you will strip off the DWR, durable water repellancy, and you will definately need to reproof the garment. When reproofing let the garment hang to dry but while it is still damp get your tumble drier warm and then pop in the garment for the last 5-10 minutes to finish drying it. This heat will help to reactivate the DWR that you just reapplied to it.

If your waterproof breathable garments have any rips or tears in them then we have a range of tapes and patches that can be used to repair them.


Footwear

It is a great time of year to check if your leather footwear needs reproofing to improve or restore its water repellancy. There are a range of  treatments for different types of leather available in spray on or sponge on applications or work in with your fingers. Whichever method you use make sure the boots are clean and a little damp before you begin the treatment. While you are reproofing them its worth taking the time to check the laces, nothing more frustrating than snapping a lace on a hike, hooks and eyes and soles to make sure they are in good condition.

Packs.

Packs don’t need a huge amount of maintenance, they can be washed with warm soapy water. Some smaller packs have removable backs so you turn them inside out to wash out the insides. Bigger packs you will just have to wash out as best you can. If you want to restore some water repellency you can use a spray on proofer or you can use a solar proofer to give some protection from UV damage to help make your pack last longer. While cleaning your pack check all the buckles and zippers to make sure that they are working properly. If zippers are a bit stiff you can clean them out with soapy water and then apply some zip lube to make them run smoother.


Sleeping bags and mats

If they have been stored properly through the winter, in large storage sacks or hanging in a closet, then there shouldn’t be much you need to do other than turn them inside out and give them an airing on a nice sunny day. If they do need a wash then follow the manufacturers instructions and Use only mild soap, not detergent. Wash in a front-loading or commercial machine or by hand (NOT in an top-loading agitator machine or by dry cleaning). Rinse very well. Be very careful lifting up a wet sleeping bag; support all of its weight. Tumble dry on low heat (throw in some tennis balls with a down bag).

If you have any inflatable sleep mats, and if you don’t you need to find out what you are missing!, then inflate them and make sure that there are no leaks or issues with the valves. Patch kits and valve repair kits are available for most makes.

Tents

Set up your tent or shelter outside. Clean off any dirt and debris. Hand wash, if necessary. Make sure you have all the parts. Repair any rips. Now is a good time to seam seal your tent for the new season.  Check the poles to make sure that you don’t have any cracks or lost ends or snapped bungee cord. Many of these things can be fixed yourself but it is possible to get replacement poles or pole sections from some manufacturers. Check any footprints for damage. Count the tent pegs and make sure you still have the right number. Tent flys can be reproofed using a spray on reproofer if necessary.Make sure your tent is fully dry before packing it.


Stoves and filters.

Both stoves and water filters require regular maintenance to make sure that they are working as efficiently as possible. Check with the manufacturers instructions. The users manuals are often available on line like the MSR and Primus ones from here

http://cascadedesigns.com/msr/FAQ/Stoves

http://www.primuscamping.com/support.php

MSR also supply annual and expedition maintenance kits which contain everything you need to give your stove a new lease of life. I just serviced my MSR whisperlite international stove and now it runs as good as new.

When checking stoves and filters pay particular attention to the small o-rings used to seal various parts as they tend to be the parts that perish or get damaged most readily.

If you need spare parts for a Primus stove come in and see us as we have a dealer kit and may have just what you need.


Water bladders

it is important to check these really carefully especially if they haven’t been used and/or cleaned for a while . I like to use a sterilising cleaner to make sure there are no nasties living/growing in there. You can buy sterilising tablets that you dissolve in water and then add to the bladders and run through the hoses. You can clean them with boiling water to kill of germs or use a range of other treatments such as these.

Mild Bleach solution

Baking soda and lemon juice or vinegar

Denture cleaning tablets


Whatever you do its a great feeling to have everything prepped and ready to go for all those spring, summer and fall adventures that you have planned.


Have fun out there!

Posted in Uncategorized | Leave a comment

Getting in shape for the Kayaking season

untitled


While it is true that the best exercise for kayaking is kayaking that’s not to say that there aren’t different disciplines that can help us prepare our bodies for another kayaking season.

If you are one of those passionate people who paddle year round whatever the weather then you are probably in good paddling shape as a result. But for many the paddling season revolves around the warmer months of the year and so after the off season we may need to help our body get prepared for paddling.

As we get older our body takes longer to recover from injury and so using specific exercises to target those injury prone areas can help make our paddling more comfortable and hence more enjoyable.

Generally speaking kayaking is a low impact sport carried out at a fairly relaxed pace but it is often carried out for a long period of time, whole days or multiple days in succession. This can lead to stresses and strains on the body which become cumulative in effect.

So how can we help get our body into shape for the paddling season and also help maintain our muscles to prevent injury? There are many different fitness regimes and methodologies available to us nowadays and I want to suggest a few starting points that you can explore as you see fit.

One downside to kayaking as a form of exercise is that it is not immediate, it takes a certain amount of preparation to get ready then the travel to the water, unless you are lucky enough to live right on the water with boat storage in place. Then there is the time to set up the boat and dress appropriately. So it is very easy to think that you don’t have the time to get out there. So our all round kayaking fitness can be improved  by adding in sessions of moderate exercise that are more immediate, walking, jogging, cycling all require us to do no more than step outside our front door.

Some form of strength training will help us in several ways: a) Strength training helps to build the muscle tissues needed to give you more power in your strokes. b) It helps to build endurance for those long trips. c) Strength training also aids in developing muscle coordination, balance and “body awareness”.

Strength training will use some form of resistance training , the resistance being provided by weight either your own body weight or separate weights. This article lays out some good basic exercises to build up a routine that will work and develop all the key areas of the body for paddling or you could use elements of them to target particular areas.

http://theseakayaker.com/sea_kayak_exercises/kayakers_workout.html

If you are not confident or keen with weights then maybe use an exercise ball to help develop strength and stamina. This article gives some useful exercises targeting the core and legs.

http://www.seakayak.ws/kayak/kayak.nsf/0/92e0356cda312a60852570df00485010

One part of the body that is particularly at risk when kayaking are the shoulders, especially if you are practising or using some of the more dynamic braces and rolls. So this article offers a few simple exercises to target and strengthen shoulders.

http://www.paddlinglight.com/articles/shoulder-exercises-for-kayaking-and-canoeing/

In order to maintain flexiblility stretching before and after paddling can be very important. I like to perform a few pre paddling stretches both before and after getting into my boat to improve my flexibility and to involve my core more in my paddling. This article outlines the need for stretching and gives a couple of very simple stretches that are easy to perform before and after paddling.

http://www.paddling.net/guidelines/showArticle.html?531

If developing flexibility, core strength and balance is a desire then I found using yoga to be really beneficial to my paddling, especially in terms of my flexibility when I was learning to roll.

These articles outline a couple of sequences of postures selected especially for kayaking.

http://yogaforkayaking.com/?p=157

http://www.wavelengthmagazine.com/2009/FA09/yogaforkayakers.html

Hopefully this has given you some ideas to help get into shape for kayaking and to maintain strength, flexibility and endurance for paddling. Remember to seek advice before beginning any new fitness regime. Consult your doctor and also consider getting training from a gym, fitness centre or yoga school before attempting any new activity.


Posted in Uncategorized | Leave a comment