Winter Camping

If you have never been winter camping then you are missing out on a fun adventure. Winter camping can be a magical experience of huge star filled skies and bright moonlight nights. However to really enjoy winter camping it is important to be prepared for the significant differences between winter and summer camping. One of the biggest differences is the length of the night. In the summer you might only get 6 hours of darkness whereas in winter you could easily have 14 hours of darkness, if not more.

Mode of travel.

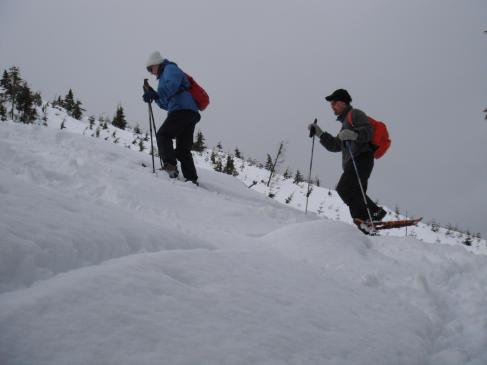
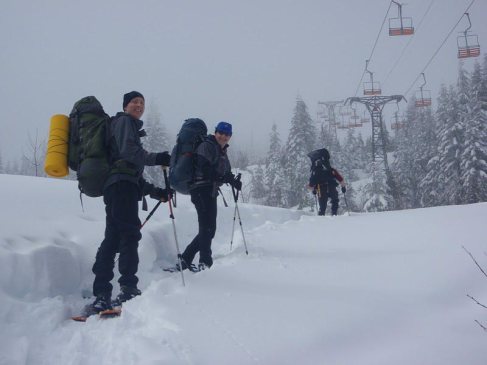
Travelling in winter will involve extra equipment to compensate for the snow on the ground. Typical equipment would be snowshoes, backcountry XC skis or backcountry skis. Whichever you are using it’s a good idea to have a suitable repair kit should you have any problems with the equipment as it can take a long time to walk out through deep snow.


Extra equipment

As well as skis or snowshoes to travel with you are going to need some additional equipment for winter camping. One very important item is a good snow shovel, perfect for digging out snow caves, tent platforms, cooking shelters. If you are travelling in avalanche terrain make sure you have been trained in avalanche awareness and have the required safety equipment and know how to use it. You will need a winter sleeping bag. A general rule of thumb is use one that is rated 10 degrees below the minimum temperatures that you are expecting.

Image

Keeping warm and dry.

Layering is of the utmost importance in winter activities. The mantra of winter travel is stay dry at all costs. In winter having wet or damp layers will cause you to lose heat very rapidly. So follow the advice in last month’s article on winter clothing to make sure that you will stay comfortable in winter environments. Adjust layers as necessary to prevent sweating. Why not just have lots of layers on and sweat? Heat loss from a wet surface can be up to 25 times greater than a dry surface (due to the higher density of water). If you sweat and get soaked, you will lose heat much more quickly through evaporation of the water. Also you are losing an incredible amount of water through sweating since the air is so dry. Too much water loss leads to dehydration which significantly increases the risk of hypothermia. So you want to control your layers so as to be warm at the activity level you are in but not sweating profusely.

As you go through the day you will be adding and shedding layers frequently, much more so than in summer.

  1. When you first get up in the morning (and at the end of the day in camp), your activity level will be low as will be the temperature. You will need to have many, if not all, of your layers on at this point until breakfast is over and you have started to become active.
  2. When you get ready to be active, you will need to take off layers since you will begin generating heat. A good rule of thumb is to strip down until you feel just cool, not chilled just before activity. Failure to do this will mean overheating, sweating, losing heat and you will have to stop in 10 minutes down the trail anyway to take layers off. Open or closing zippers, rolling sleeves up or down, taking a hat off or putting one on will all help with temperature regulation.
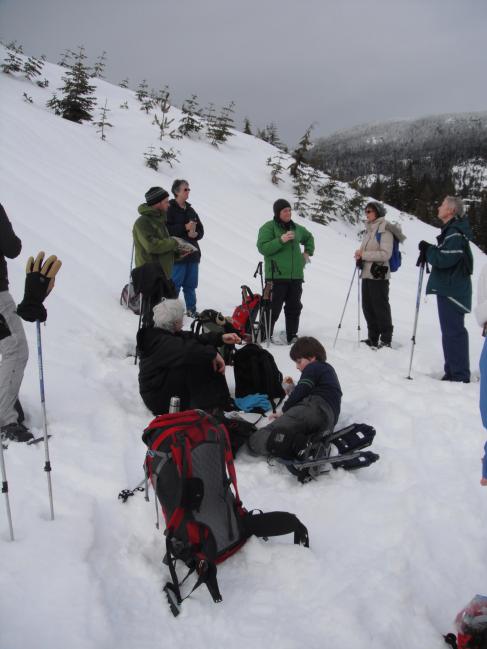
  3. If you stop for more than a few minutes, you will need to put on another layer to keep from getting chilled. Keep a layer close at hand.
  4. Whenever you get covered with snow, either from a fall or from dislodged snow from a tree, it is essential to brush yourself off to keep your clothing free of snow. Failure to do this often results in the snow melting into your clothing and refreezing as ice.
  5. At the end of the day, as activity decreases and temperature drops, you will need to add layers. Once you start to cool down it takes a lot of the body’s resources (calories) to heat up again so layer up ASAP before you get chilled. It may be good to put on more than you think you need; it will only get colder. If you are too warm, you can open up layers and ventilate to reach the proper temperature.

A good heavyweight down jacket is perfect for this evening layer. It is great to put on while you are sitting and cooking and eating supper.


Setting up camp.

Think about where you will camp to avoid low lying areas where cold air tends to sink and collect such as valley bottoms, lake margins. These will also be darker and cooler in the morning as the suns warmth will hit the hilltops and sides before reaching into the valleys.

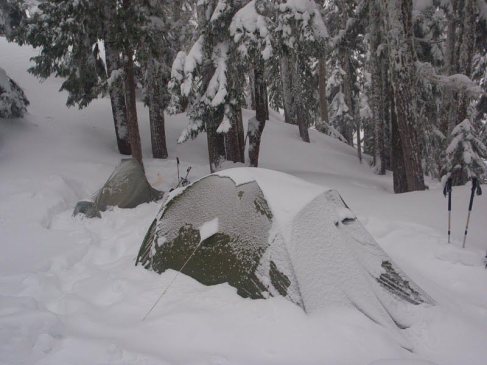
If you have access to a 4 season tent then this will be ideal but if not then it is possible to camp in winter in your 3 season tent. 4 season tents are generally sturdier, withstand wind and snowloading better and have much less mesh to improve warmth inside them. They are also generally heavier. My 3 person 3 season tent weighs under 5lbs but my 4 season 2 person tent weighs nearly 7lbs. To prevent  cold draughts if using a mesh lined tent pack snow around the edges of the tent. Your tent wants to be a freestanding model requiring minimal pegging as it it is hard to use regular tent pegs in snow. I use my skis as pegs, 4 skis are enough to hold the tent upright.

Image

When you first get into camp, leave your snowshoes or skis on and begin to tramp down areas for tents and your kitchen. If possible, let the snow set up for 30 minutes or so, this will minimize postholing once you take snowshoes or skis off. Set up your tents with the doors at 90 degrees to the prevailing winds. Stake the tents out. On a cold night you can build snow walls on the windward side of the tent. Mound the sides of the tent with snow (have someone inside pushing out on the tent to keep it from collapsing). When the snow sets up you will have a hybrid tent-snow shelter which will have better insulation than the tent alone. Dig out a pit in front of your tent for a porch. This makes taking your boots off much easier. Put your foam pads in the tent and unstuff your sleeping bag and place it in the tent so it can “expand” from it’s stuffed size.

Some people prefer to travel lighter and dig a snowpit or snow cave to sleep in, if this is going to be the case make sure that you leave plenty of time for its construction and that you have practised beforehand so that you can quickly and efficiently make your shelter. There is lots of information in books and online to show you how to create a range of different snow shelters. Make sure that you don’t build up too much of a sweat when digging out the snow and get chilled afterwards and always ensure that your shelter has adequate ventilation.

If the snow is deep, you may want to dig out a pit for your kitchen. Dig a pit at least 6 feet in diameter (for 4-6 people). You can mark out the circle using a ski or a rope. Dig down about 2-3 feet and pile the excavated snow around the perimeter. Pack the snow at the perimeter of the hole with your shovel. This will give you a 4-5 foot deep area, protected from the wind. You can carve out seats and benches, put your skis or snow shoes behind the pile as backrests, carve places for stoves, etc.

Cooking and food.

Planning food for winter activities must take into account the great demands the cold weather and physical activity places on the body along with the difficulty of preparing foods in the winter (it takes time, stove fuel) and having a menu which appeals to the group. Appetite is generally reduced during winter activity even through the food needs of the body have increased. If the meal isn’t appealing, it won’t get eaten. In some situations you literally need to force yourself to eat.

A liquid fuel stove generally works better in the winter as they burn hotter, boil water faster and cope better with colder temperatures than propane/butane cylinder stoves. However the cylinder stoves have got much better in recent years and now offer reasonable performance in winter conditions. Make sure your stove is in good working order, if necessary give it a service at the end of the summer, as having a malfunctioning stove on a winter camping trip is no fun. Use a windshield to reflect heat back into the pot so as to speed up cooking time and I like to use a base plate under my stove to prevent it sinking into the snow and tipping over.

I prefer to use the dehydrated packet meals as preparation is minimal and all I need to do is boil water and add it to the package. Once I have added the water it has to be left for 10-15mins before it is ready to eat. This is where these packet meals really shine as I can pop it into the inside pocket of my down jacket where it will act as a giant bodywarmer until the food is ready.

Drinking water

It is really important to maintain hydration levels during winter exercise and fortunately water is easy to find as it will be lying all around in the form of snow. Clean, fresh snow can be melted and doesn’t require any treatment. If you are worried about the snow then it is probably best to boil it for a few minutes to treat it. If you are extracting water from lakes or unfrozen streams bear in mind that chemical treatments may not be as effective at cold temperatures and may take significantly longer to work. Using pumps and filters is not recommended as any residual water may then freeze and the expansion of the ice formed may damage or crack the pump workings. I prefer to use wider mouthed Nalgene style bottles in the winter rather than a bladder as the small amount of water in the tubing of a bladder can easily freeze. The Nalgene style bottles make great body and sleeping bag warmers when filled with warm water.

General night sequence

After dinner, getting warm water for water bottles, and putting gear away, it’s time for bed. This is a general sequence:

  1. Get warm before you get into your bag. Do some jumping jacks, etc. so your heat is built up for when you get in your bag.
  2. Get any clothing/gear you will need out of your pack as well as full water bottles and tomorrow’s lunch.
  3. At the tent door, brush off any snow on your clothing . Sit down inside the tent entrance and, keeping your boots outside, either have a friend brush them off, or remove them and brush them yourself.
  4. Climb into the tent and close the door.
  5. Strip off your layers of clothing to what will be appropriate in your sleeping bag. The more layers you wear the better insulated and the warmer you will be (contrary to the myth that says sleep in your underwear). However, too much clothing can compress dead air space in the bag and reduce its effectiveness.
  6. Remove any wet/damp layers and replace them with dry ones, particularly socks. Dry socks can make all the difference to feeling warm in your sleeping bag.
  7. Pre-warm your bag with your body (get it nice and toasty).
  8. Place damp items in the sleeping bag with you near your trunk. This will help dry them overnight.
  9. Place your boots in your sleeping bag stuff sack (turned inside out) and place the stuff sack between your legs. This will keep them from freezing during the night and the stuff sack keeps your legs from getting wet. Or remove the liners from your boots and bring them into your bag and leave the outers in the tent.
  10. Put water bottles and food with you in the bag.
  11. A hat will help keep you warm.
  12. Try to sleep with your face out of the bag. This reduces moisture build-up inside the bag (which could be catastrophic for a down bag). A scarf on your neck may be better than using the sleeping bag neck drawcord (which makes some people feel a little claustrophobic and creates a difficult nights sleep).
  13. You will probably wake up a number of times during the night. This is normal in cold weather. Your body needs to change position to allow for circulation to compressed tissues and to move around a bit so that muscle movement generates more heat. If you are still cold, eat some protein to “stoke up your furnace” If that doesn’t work, wake a tent-mate for some extra warmth.
  14. With 10 or more hours in the tent, you are likely to need to urinate in the middle of the night. Go for it! Otherwise you won’t get back to sleep, and your body is wasting energy keep all that extra fluid warm. You will be surprised how quickly you can get out and back in and your body really won’t chill that much.  If you really don’t want to get out of the warmth have an old Nalgene bottle, suitably labelled!, as a pee bottle, just be careful not to miss!
  15. It is useful to have a thermos of hot drink in each tent.
  16. Make sure the tent has adequate ventilation to ensure that you don’t get too much moisture build up in the night.

 

Posted in Uncategorized | Leave a comment

Choosing Snowshoes.

Snowshoes come in a range of different sizes determined by the length of the snow shoe in inches. Women’s snowshoes are typically 21, 23 or 27 inches and men’s are 25, 27, 30 inches. It is possible to find snowshoes shorter than 21 inches and these are usually classified as youth or children’s snowshoes. There are snowshoes produced that are bigger than 35 inches, but it would be rare to need a snowshoe that big over here on the west coast.

Image

So how do you know what size to buy? Well there are a couple of considerations to think about. Firstly weight, this should be your clothed weight plus the typical weight of your winter pack. So you may weigh 160 lbs on the scales but add on boots and winter clothing plus a pack and that could bring your weight up to 180-190 lbs. Basically the heavier you are the bigger the snowshoe you need to spread that weight out and prevent you from sinking into the snow. Most snowshoe companies will produce a weight chart to help determine what size snowshoe you need. Here is the one from Atlas snowshoes.

Mens

Image


Womens

 Image

The second consideration alongside weight is snow conditions. If you regularly snowshoe on prepared trails and on older more consolidated snow then you can use a smaller shoe than if you travel off trail through newer, softer snow which is likely to be deeper and need a bigger snowshoe. The type of snow will also play a part in your decision, on the west coast our snow tends to be wetter and heavier and consolidates faster so smaller shoes are in order. Whereas in other parts of Canada the snow is drier and lighter and offers less support to the snowshoe.

What if I snowshoe both on and off trails? Well you could buy 2 pairs of snowshoes or a more economical option is to buy snowshoes, such as the MSR, that can have optional tails added to them. The tails will extend the length of the snowshoes by 3-8 inches and give you the extra float you need. They can be removed when you no longer need them on.

What if I like to explore steeper terrain? If you are looking for a snowshoe to help you in the mountains or anywhere with steeper inclines to get up then look for one of the models with a heel lift. This is a movable bar that you can raise or lower. When you raise it it gives your foot more support on steeper slopes and so reduces the amount of strain on your calf muscles meaning you will be less tired over the course of your trip. It also gives you a more secure footing when climbing snowy slopes and prevents the snowshoe from slipping back.

We sell snowshoes by Atlas, MSR, Backcountry and Crescent Moon. Check them out instore or here.

http://atlassnowshoe.com/

http://www.crescentmoonsnowshoes.com/

http://cascadedesigns.com/msr/snowshoes/category

Posted in Uncategorized | Leave a comment

Clothing for winter hiking

Hiking in winter brings with it the amazing beauty of a snowy landscape but also some issues of comfort due to the much reduced temperatures and the problems associated with getting chilled.

Starting with the innermost layer a good moisture wicking base layer is vital. It is really important to stay as dry as possible next to the skin to prevent serious chilling and the risk of hypothermia when you stop moving. Either synthetics such as Helly Hansens polypropelene or the natural merino wool of Smartwool or Ibex will keep you dry by wicking away any sweat you generate.

The next layer, the mid layer can be fleece, softshell,wool anything nice and breathable to move the moisture you generate to the outside where it can dissipate into the air. Layering is really important in winter and attention to the layers is vital, if you are getting too hot adjust the layers by removing one or replacing a thick layer with a thinner one. If you are chilly slip on an extra layer.  Most manufacturers of quality hiking clothing produce warmer pants for hiking such as the Sherpa Kala Pathar or Himal. These have a microfleece lining for added warmth.

The outer layer may not have to be a hard shell. In winter we are generally less worried about precipitation as hopefully any that falls will be as snow rather than rain. A wind resistant but breathable outer layer such as a softshell or a primaloft layer may be all we need to stay protected. Most hardshells work by allowing a humid atmosphere to develop inside the garment in order to allow the breathability of the material to function. This means that as we are moving the inside of hard shells tend to be rather clammy and this layer can very quickly cool us when we stop. I generally only put on a hard shell in winter to cut out the wind unless it really is snowing heavily. But hopefully we will be hiking on perfect bluesky days. Look for outer layers with lots of venting options such as pit zips, full front zips or thigh vents on pants.

Image

Make sure you have good gloves and perhaps more than one pair, I usually have a thin liner glove, a warmer glove and my big waterproof mitts as a backup. Headwear is important too, the old adage “if you are cold put on a hat” really applies in winter, we lose most of our heat through our head so make sure it has a cover.

When we stop for lunch or a break it is important to add a layer to keep warm as we will cool down much more quickly in winter than the rest of the year. This is where insulation layers made from Primaloft or Down are really important. Down is lighter, more compressible and warmer than synthetics like Primaloft but it is more expensive and will lose its insulation to a much higher degree than Primaloft if it gets wet. It is possible to get Primaloft insulated pants which are great if it is really cold or you are one of those people who really feels the cold.

I always bring extra layers just in case. I have a spare toque, socks and spare base layers in my pack in winter. If you get the next to the skin layer wet, either through snow ingress or sweat then it may be necessary to remove the damp layer and put a dry one on. It is amazing the difference a dry layer next to the skin will make to your comfort. When you are travelling in winter try not to over exert yourself, move at a good steady pace that doesn’t cause you to perspire too much and you will be much more comfortable.

When suitable attired winter hiking is a real pleasure moving through a completely altered environment gives us a whole different experience compared to travelling the same environment in the summer.

So get out there and enjoy the outdoors in winter but go prepared and you will enjoy it all the more.

Posted in Uncategorized | Leave a comment

Clothing for paddling in the winter.

 Now that the summer sunshine has gone, if we are going to keep paddling through the fall and into the winter we need to think carefully about what we wear. In summer the should I dress for the air temperature or the water temperature question is usually answered with the answer air. Should we end up in the water then we usually can get out of it and get warm again relatively easily. Assuming that we are in sheltered waters and close to the shore and the weather is benign. When the air and water temperature is much cooler then it becomes much more important to consider how many layers and what clothing to wear.

Water is considered cold when its temperature falls below 60 F (16C).  Being in water at or below this temperature will quickly lead to problems for a paddler. Water will cool the body 25 times quicker than air of the same temperature, quickly causing us to shiver, lose the ability to think straight and  lead to hypothermia setting in. How quickly this process occurs will be determined by the protection given by the clothing that you are wearing. If you have no protective clothing then the loss of manual dexterity can happen as quickly as 10-15 minutes in water of 10-15C. This video gives you an idea of how the clothing you wear can affect your survival time in the water.

So realizing that we need to be protected from the effects of cold water immersion what are the clothing options we have as paddlers. While the full survival suits are the best way of giving us the best chance for survival should we be in the water for a long time, they are not very practical for paddling in.

The first key point is to ensure that we always have our pfd on at all times. The floatation and insulation that it provides can make the difference between life or death.

When it comes to giving us some thermal protection we have two choices, wetsuit or drysuit. Wetsuits are made of neoprene rubber up to 7mm  in thickness and they are designed to work by trapping a thin layer of water next to the skin which the body then warms up. The neoprene insulates the body from the temperature of the water thus slowing down the cooling process and increasing our survival time in the water. Kayakers typically wear the farmer john/jane style of wetsuit which is sleeveless so that the paddling motion is  not impeded. Most paddling wetsuits are in the 3-4mm thickness. The extremities will be protected by neoprene bootie or boots, gloves or pogies and a fleece hat/balaclava or a neoprene hood. Over the top of the wetsuit paddlers will layer a paddle top and pants to cut down on the chilling effect of the wind.

Drysuits work by excluding the water from getting to the body. They have latex neck and wrist seals as well as ankle seals or sewn in socks. the drysuit will give you the best protection against cold water providing you are suitably dressed underneath it. The suit itself doesn’t provide much insulation so you need to layer up underneath with base and fleece/wool layers to give you the insulation should you end up in the water. The first time I wore my drysuit and was in the water for a significant amount of time I was surprised by how cold it felt. I was just wearing a base layr pant and a thin fleece top. I was warmer than my fellow guides in their wetsuits but I could feel the water temperature through the suit material and quickly appreciated the need for thicker, warmer layers underneath the suit. This layering needs to be warm enough should you go in the water but not so warm as to make paddling uncomfortable. The PFD foam will provide a good level of insulation for your core should you be in the water, another reason to be wearing it at all times.

GORE-TEX® Expedition Dry Suit - Men           VS       

Paddling in the winter can be a lot of fun but it is important to make sure that we are properly attired in order to really enjoy the experience and also to be able to deal with any unforseen or unplanned problems that may arise. So if you are paddling in the winter enjoy it and stay safe out there.

Posted in Uncategorized | Leave a comment

Under the Eagle’s Nest

It didn’t work.

I’ve tried everything and no matter what it was, it just didn’t work.

I tried dog biscuits, but nothing happened.

“…Why dog biscuits,” you ask?

Continue reading

Posted in Under the Eagle's Nest | Leave a comment

Buying Footwear this Fall!

This fall season the health and happiness of your feet should be of the utmost importance to you. It can be a tricky business picking out the right type of footwear that allows you to continue being the adventurous person we at Alberni Outpost know you to be. However here are some helpful hints to take you a long way when planning your next purchase of boots.

Continue reading

Posted in Gear | Leave a comment

Pete’s Tips

With summer finally here and long hot days on the water now is a good time to think about ways to protect ourselves from the damaging suns rays.

Continue reading

Posted in How to: | Leave a comment

Under the Eagle’s Nest


Organized.

Kayak fishing requires you to be …organized.

After all, there’s not a whole lot of acreage available on a kayak, is there? Not even on one designed for fishing, like my Ocean Kayak Trident 13. So, you’ve just got to be organized.

Continue reading

Posted in Under the Eagle's Nest | Leave a comment

Picking the right pack!

We know, you don’t really want to think about it yet, but the right school bag requires some thought, whether it’s for yourself or for your child. A bag loaded with books can be more than hot and uncomfortable, it can be damaging to your health. Before you pick up your next bag, ask yourself these questions:

  • How much weight will the bag need to support?

A child should carry no more than 10% of her body weight. An adult should be shouldering no more than 20%.

  • Will this bag support the weight properly?

Continue reading

Posted in Gear | Leave a comment

Sayward Lakes Canoe Circuit

If you love water and the wilderness, the Sayward Forest Canoe Circuit is a trip you’ll want to mark down on your calendar this summer. This beloved paddling route follows twelve scenic lakes linked by a number of portages.

Located just north-west of Campell River, the Sayward Lakes circuit is 48km long (7km of portaging) and can be completed in about 4 days. Not counting four sets of small rapids (you can portage around these), the route itself is considered suitable for the novice canoeist. The portage trails are wide enough to accommodate a single canoe or kayak cart.

Continue reading

Posted in Travel | Leave a comment